


Replace the operating system on nodes
The VM template defines the operating system of the cluster nodes. To move to another OS or to another OS version, prepare a new template with the required operating system and the same Kubernetes version, and replace the VM template in the node group configuration.
It is recommended to use one OS within the cluster.
Changing the Kubernetes version on nodes is done in the same way. See VM nodes and templates.
The instruction applies to clusters with providers that work with VM templates:
- oVirt and similar environments: zVirt, HostVM, RED Virtualization, ROSA Virtualization;
- VMware vSphere;
- OpenStack and similar clouds;
- Basis Dynamix;
- VMware vCloud Director;
- Yandex Cloud.
In a hybrid cluster, replace the VM template in the groups of the main provider that uses virtual machines. Replace the VM template separately in each Control Plane and Worker node group that should receive the new OS.
When the VM template changes, Cluster API recreates the nodes of the group according to the recovery strategy set in the group configuration, RollingUpdate or OnDelete. See Cluster API configuration.
If a node with the new VM template does not become Ready, do not delete it. First replace the VM template in the group configuration and check the requested replica count.
Step 1. Prepare the template in the virtualization platform
- Select an OS from the list of supported operating systems for cluster nodes. If necessary, you can prepare a VM template with an OS outside the tested list. In this case, successful cluster deployment and the correctness of the template configuration are not guaranteed.
- Create a VM and prepare a VM template from it, with the new OS, by following the step-by-step process for creating a template.
Keep the Kubernetes version in the new template the same. The correspondence between the platform version and Kubernetes is given in the table.
Step 2. Add the template to the provider instance
Add the new VM template to the provider instance on which the cluster was created.
Open the Platform tab. In the Infrastructure providers block, click Manage.
Screenshot: Platform tab, opening providers
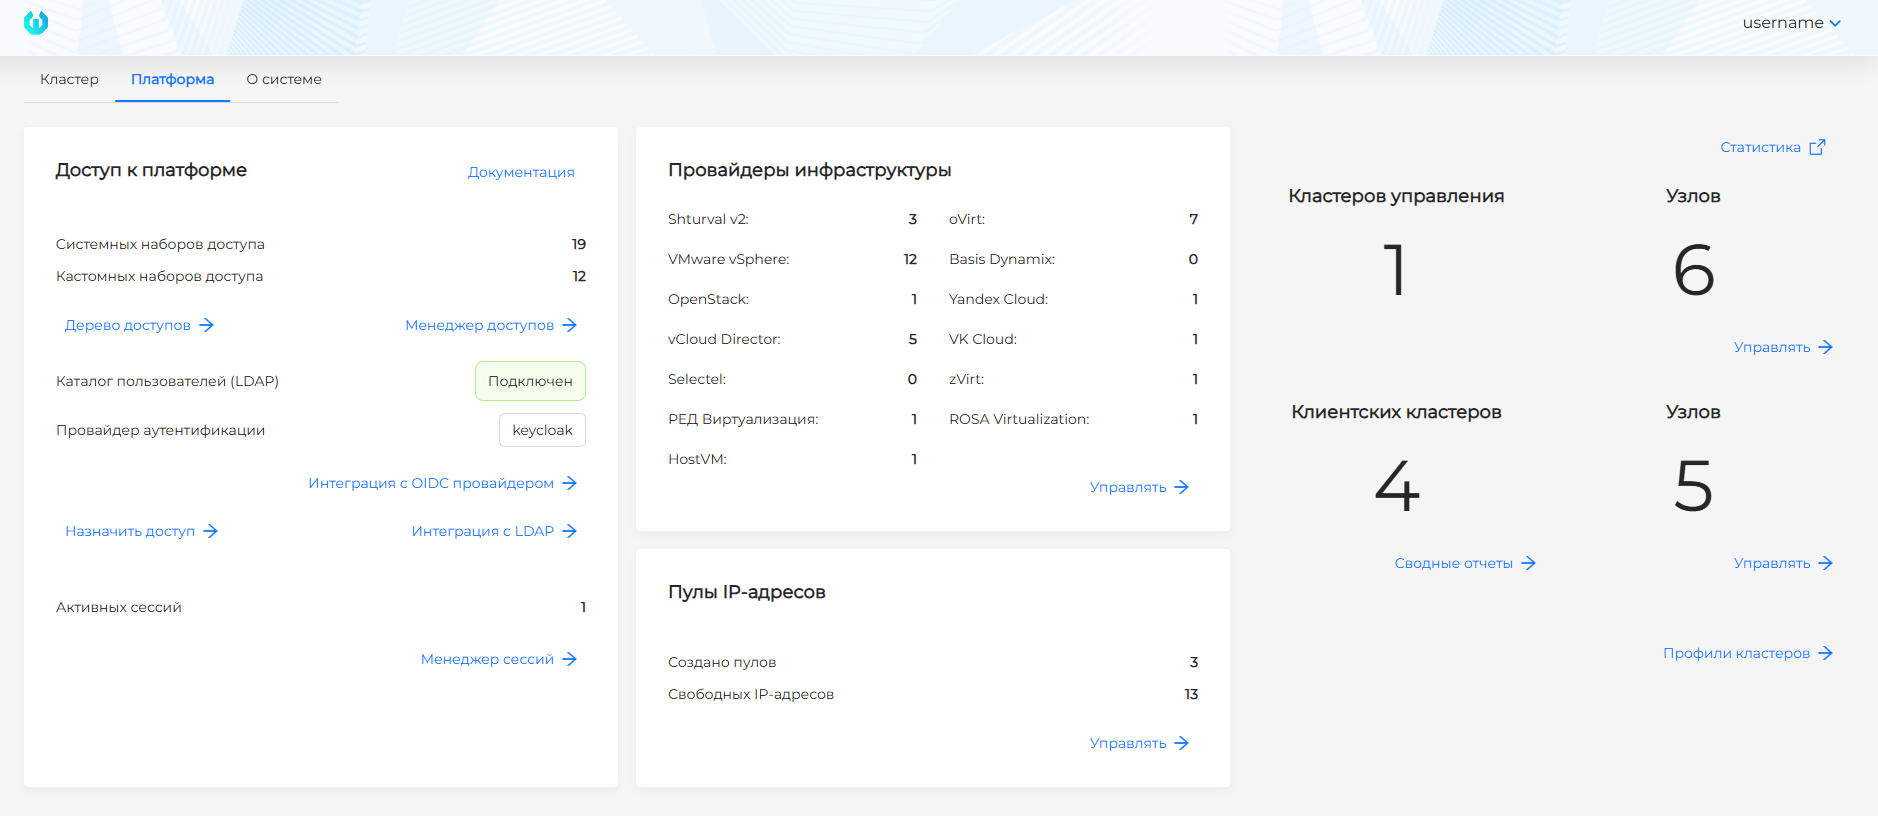
Open the provider instance of the cluster.
Screenshot: provider configuration

In the Virtual machine templates block, click + and select the prepared VM template with the new OS.
Screenshot: adding a VM template and a Kubernetes version

Save the instance.
Step 3. Replace the template in node groups
Do this step in the GUI or in the CLI for each group that should move to the new OS.
In the cluster, open Administration → Node Management.
Screenshot: node management

To the right of the group name, click Group configuration and open the InfraMachineTemplate tab.
Screenshot: InfraMachineTemplate tab

In the VM template field, select the prepared VM template that you added to the provider instance in step 2.
Screenshot: VM template field

Save the changes in the group configuration.
After you save, a new InfraMachineTemplate is created. Open Administration → Node Management and watch the OS update on the nodes of the group. Wait until the number of nodes in the Ready state matches the requested replica count in the configuration again. On the InfraMachineTemplate tab of the group configuration, the VM template field shows the new template. In the group manifest, infrastructureRef.name is the name of the new InfraMachineTemplate.
The commands run in the management cluster. The namespace matches the client cluster name: the node group objects are stored there.
Create a new InfraMachineTemplate as a copy of the group’s existing template, with a different name and the new VM template. Replace the InfraMachineTemplate in the MachineDeployment and the KubeadmControlPlane.
InfraMachineTemplate
The name and kind of the InfraMachineTemplate are set in infrastructureRef. The kind depends on the provider. Fields of each kind are listed in the InfraMachineTemplate reference.
| Provider | Kind |
|---|---|
| VMware vSphere | VSphereMachineTemplate |
| oVirt and similar | OVirtMachineTemplate |
| OpenStack | OpenStackMachineTemplate |
| Basis Dynamix | BasisMachineTemplate |
| VMware vCloud Director | VCDMachineTemplate |
| Yandex Cloud | YandexMachineTemplate |
Get the InfraMachineTemplate for Worker groups from the MachineDeployment resource, and for the Control Plane group from the KubeadmControlPlane resource, as shown below:
kubectl -n <cluster-name> get MachineDeployment
kubectl -n <cluster-name> get MachineDeployment <group-name> -o jsonpath='{.spec.template.spec.infrastructureRef}{"\n"}'
kubectl -n <cluster-name> get KubeadmControlPlane <cluster-name>-control-plane -o jsonpath='{.spec.machineTemplate.infrastructureRef}{"\n"}'
New InfraMachineTemplate
Save the existing InfraMachineTemplate to a file. Example for VMware vSphere:
kubectl -n <cluster-name> get VSphereMachineTemplate <InfraMachineTemplate-name> -o yaml > inframachinetemplate.yamlIn the file, set a new
metadata.namethat does not yet exist in this namespace. Keepnamespace. Keepmetadata.labelsif they are present.Delete the system fields
uid,resourceVersion,generation,creationTimestamp,managedFields, and the wholestatusblock from the file. Inspec.template.spec.template, replace only the VM template name. The name must match the name in the virtualization platform and the name you specified on the provider instance.Fragment of the file after editing, for VMware vSphere:
apiVersion: infrastructure.cluster.x-k8s.io/v1beta1
kind: VSphereMachineTemplate
metadata:
  name: <new-inframachinetemplate-name>
  namespace: <cluster-name>
spec:
  template:
    spec:
      # datacenter, datastore, diskGiB, memoryMiB, numCPUs, networkName, and the other fields are from the group's current template
      template: <vm-template-name-in-virtualization>
Apply the new InfraMachineTemplate in the cluster.
kubectl apply -f inframachinetemplate.yaml
Add the template to MachineDeployment and KubeadmControlPlane
kubectl -n <cluster-name> patch MachineDeployment <group-name> --type=merge -p '{"spec":{"template":{"spec":{"infrastructureRef":{"name":"<new-inframachinetemplate-name>"}}}}}'
Check:
kubectl -n <cluster-name> get MachineDeployment <group-name> -o jsonpath='{.spec.template.spec.infrastructureRef.name}{"\n"}'
kubectl -n <cluster-name> patch KubeadmControlPlane <cluster-name>-control-plane --type=merge -p '{"spec":{"machineTemplate":{"infrastructureRef":{"name":"<new-inframachinetemplate-name>"}}}}'
Check:
kubectl -n <cluster-name> get KubeadmControlPlane <cluster-name>-control-plane -o jsonpath='{.spec.machineTemplate.infrastructureRef.name}{"\n"}'
After the InfraMachineTemplate changes, Cluster API starts recreating the nodes of the group.
Track the recreation of Worker group nodes:
kubectl -n <cluster-name> get MachineDeployment <group-name> -o custom-columns=REPLICAS:.spec.replicas,READY:.status.readyReplicas,UPDATED:.status.updatedReplicas
Track the recreation of Control Plane group nodes:
kubectl -n <cluster-name> get KubeadmControlPlane <cluster-name>-control-plane -o custom-columns=REPLICAS:.spec.replicas,READY:.status.readyReplicas,UPDATED:.status.updatedReplicas